Making Every Ball Count with a Pachinko Data Counter and... React?
So, you decided that after reading my post on hanemono, you had to get a modern pachinko machine for yourself. And now, after spending some time finding the sweet spot on the shooter and the perfect timing for the waving arms, you realize something: there’s no score. Even Pachi-Com has that! Well, the score in a gambling game is in your wallet (and will inevitably be negative). But if you’re playing for fun? What can be done then? And can you work Javascript into it?
Count it up
It’s not quite true that there’s no score for a pachinko game– it’s the amount of balls you have when you leave, which becomes your cash through a byzantine process. But a home gamer hitting a few fever modes probably will probably have to recirculate the few balls they have just to get the machine to pay out all the rewards they deserve– and a machine will insist on paying out everything. The machine pays out the same balls that are used to play it; that’s the whole thing that allows vintage pachinko machines to run without power at all.
But in modern parlors, there is a score display of sorts. Take a look at this video of a hanemono player playing a machine identical to mine; right at the start, you’ll see this machine:
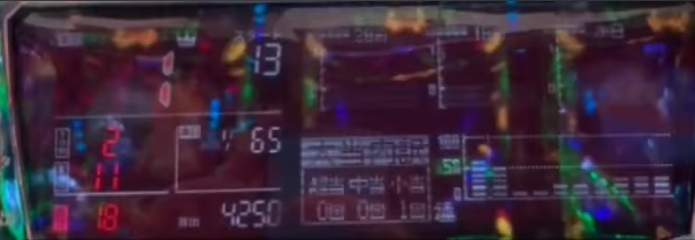
I can’t tell you exactly what this one is; it’s a still frame in a 720p YouTube video. But I can tell you the concept: it’s a data counter, sometimes called a battle counter. This displays various statistics about the machine that day: the wins, the number of start attempts you’ve had, how many winnings you’ve got, and more importantly for the “pachi pro”, these statistics over time. In theory, this lets them find a machine that should give an easy win.
Well, I’m not going to tell you how to do that, because I’m not convinced there is a working strategy. And you can, of course, just buy a data counter yourself (not sponsored). But today, I want to try to make my own. Well, “today”. This project has been in the works more than a day. Sorry.
Step 1: Signals
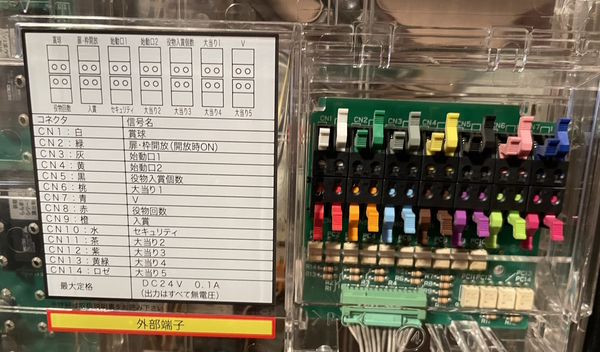
So the first step is to find where on the machine we hook up the battle counter. And of course, if you read my earlier post, you’ll see I already found it:
A whole bunch of signals, and a whole bunch of Japanese text explaining them. Thankfully, the hard work’s already done here. DaveRob on the PachiTalk forums already explains what form these signals take: because there are two terminals in this style, this is the style where a relay connects or disconnects the signal for each pulse. That is to say: they’re button presses. (I don’t think DaveRob was the first either, but he’s where I got the information)
But which button presses does the battle counter use? For that, we turn to manufacturer Daiichi, who has a quite comprehensive database for attaching their counters to a wide variety of machines, and don’t seem to take down outdated ones. Here’s CRA Wing Ranma 1/2. (This information is valid for both genders)
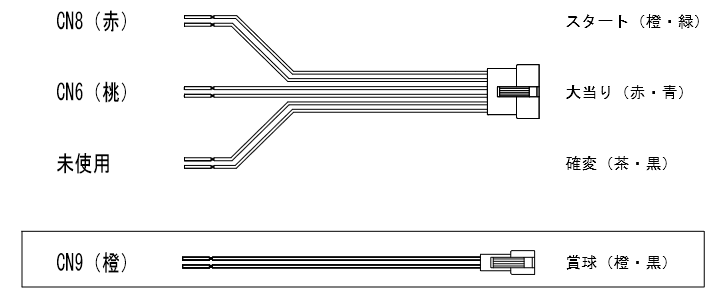
With all that massive grid of signals, the Daiichi battle counter uses only three of them.
- CN6: Active during a jackpot round
- CN8: Pulses each time the arms open
- CN9: Pulses for every ten jackpot balls won
Note that many data counters are designed for digi-pachi games that have more complicated game modes (for example, “battle”-type machines, a genre unto themselves) and probability shifts, so having unused signals on a hanemono like this isn’t shocking; the gameplay is simpler. A good example of more complex gameplay doesn’t necessarily mean more skill is required.
What might be more surprising is that there seems to be no way to count how many balls you’ve input. But that’s a natural case; the ball tray of the machine is open, you could just dump balls in. Some more advanced data counters will have a way to interface with ball loan systems, but I don’t think I have the capability to do that; at least, I don’t see it listed anywhere. I do wish they had a counter on the shooter, though.
Step 2: Collect the pieces
So, this is equivalent to a few push-buttons. The math isn’t complicated; a simple counter could probably be done with an Arduino and a simple LCD screen. So I decided to massively overkill this. We’ll be using my M1 MacBook Air to run a React web app, running in-browser using the Web Gamepad API.
To interface with the computer, I bought one of these cheap little “Zero Delay” encoder boards that litter eBay. I’m not sure if this was the exact listing I used, but they’re all the same thing:
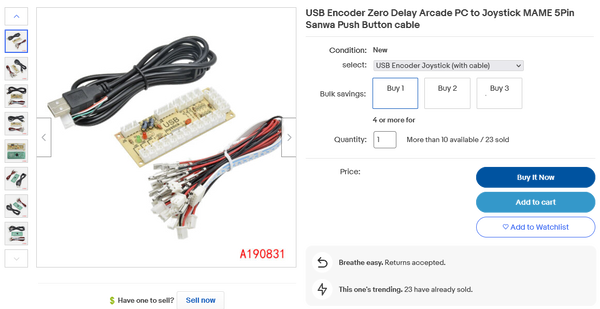
These are pretty much the bare minimum to interface a button to a modern PC (or Mac, as it were). They show up as a basic gamepad, and this kit comes with needed wires, that can just have their metal ends snipped (more on that later) and shoved in the holes on the back of the pachinko.
Using a gamepad makes the hardware easier, but it does lead to one slight problem; the Gamepad API is based around regularly polling the buttons, as that’s how game programming generally works. A keyboard device, that would fire keyup and keydown events as needed (on, say, an Arduino interrupt), might have been a bit easier to code for. We’ll just have to poll fast enough to catch anything.
I’m not sure if these actually have Zero Delay (though I’ve heard good things), but I suppose it doesn’t really matter for a pachinko machine. Trust me, you could get away with a lot of lag here and you’d never notice.
Step 3: Start coding
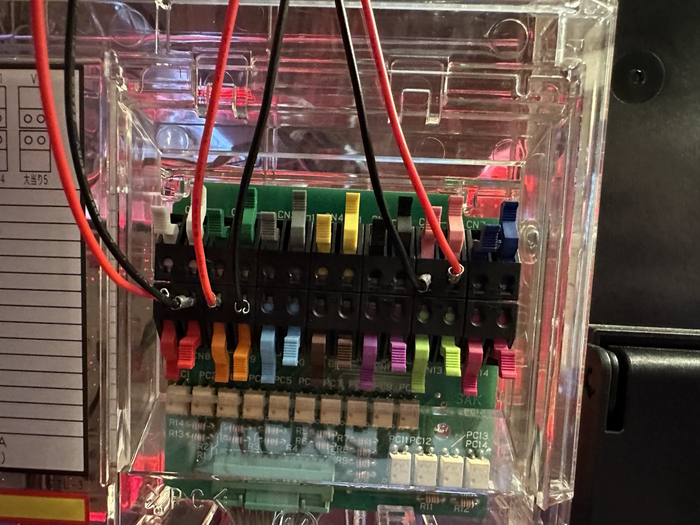
So, hooking the pachinko connectors up to the Zero Delay board is pretty straightforward; just cut off the edges. Unfortunately, the button connectors don’t fit in the small holes, but even just sticking in bare wires works fine. In fact, I’d prefer it to what I tried to do here with the metal edges, since these didn’t actually make great contact.
Because the Gamepad API, at least in Firefox, requires you to press a button to acknowledge the controller and allow the Gamepad API access (thanks, fingerprinting, for preventing us from doing things the easy way), I added a button for “reset”. This will start a new session in the software.
The initial software is very straightforward. It just shows a derived state, and all the button presses. Here’s what I got for a run during a three-round bonus:
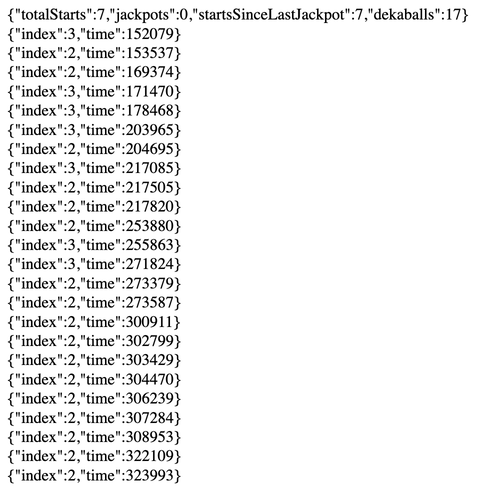
You might notice something. Starts are definitely working (7R is pretty good), and “dekaballs” (the SI unit for ten balls, of course) is counting up too. But where is the jackpot?
In this code, I was detecting buttons on the rising edge. Compared to a keyboard, it’s like I was waiting for keyup rather than keydown. And it turns out that while the other signals send pulses, the jackpot signal is much simpler: it’s connected for the entire duration of the jackpot. I should’ve realized this had to be the case; it allows for fun jackpot animations on the data counter, which I’ve seen in a number of Japanese pachinko YouTube videos.
Thankfully, this was easy enough once I realized. In fact, if you look at the code (of course I posted it!) you’ll see that I decided to store the full button press down and up state for everything detected, so I can derive whatever stats I want. It’s not like efficiency is my concern today.
Step 4: Make it look pretty
An object pumped through JSON.stringify may be nice for debugging, but it’s better to have things look pretty as well. Since I’m attaching this to a Ranma 1/2-themed machine, I decided to grab some graphics from a game which frequently appears on this blog, Ranma 1/2: Toraware no Hanayome for the PC Engine CD-ROM2.
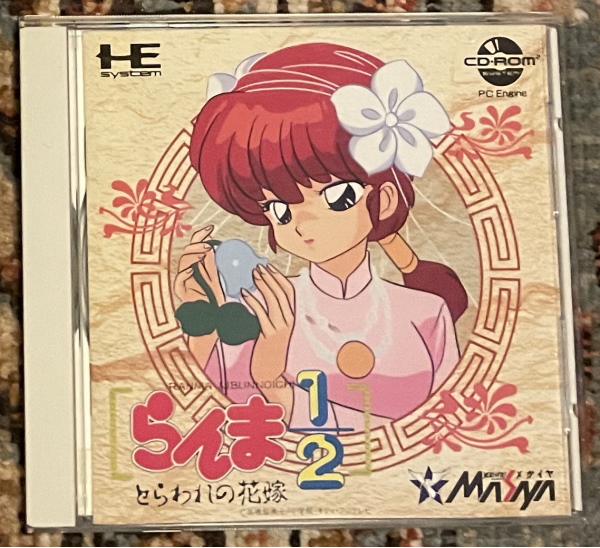
Since my emulator refused to load the game beyond the opening, and I didn’t feel like trying another one, the opening animation is the source of the graphics for the game. The opening is a lot of fun as it’s basically an anime opening (using the same music) made out of the relatively flat yet colorful art style popular among PC Engine CD games.

After a quick run of zero jackpots, I get something like this with a quick hack of some images and a few Google Fonts (which ended up being more trouble then they were worth, rendering at different heights in Firefox on Windows vs. MacOS… web design is a barrel of fun).

I also added some nice effects for a jackpot, but when I went to take pictures, I just couldn’t get any. Such is a gambling machine.
Future expansion
So this is a fun enough concept, and it is neat to have some stats while playing. But there are some future concepts I’d like to add as well:
- Right now I save prior sessions to
localStorage(when you hit the reset button, or reload the page), but I don’t actually do anything with them. Real pachinko data counters generally have some information on the history of the machine; how many jackpots have been earned in the past, the average number of starts before a win, etc. This would be pretty easy to derive. - There are additional signals on the back of the machine; just because the Daiichi counter doesn’t use them, doesn’t mean we can’t. Particularly, I’m curious if the 大当り2ー5 signals provide information on the three different jackpot types the machine has (3R, 7R, and 16R), or something else.
- What this really needs is some way to show how much money I’ve put into the machine. Real data counters do have this, but I believe they generally get it from the CR machine. I have some ideas here but nothing obvious; really wish this particular machine exposed the “ball loans” on the back.
This was primarily an experiment to see if it would work at all; and it did, so that’s nice. Hopefully this inspires your own experiments in the future!

